> For the complete documentation index, see [llms.txt](https://docs.getint.io/llms.txt). Markdown versions of documentation pages are available by appending `.md` to page URLs; this page is available as [Markdown](https://docs.getint.io/getintio-platform/workflows/storing-reference-ids-urls-across-integrations.md).
# Storing Reference IDs/URLs Across Integrations
When integrating tools with Getint, users can capture counterpart IDs/URLs in source and destination tasks. This is particularly valuable when tasks synchronized between platforms have different identifiers. Storing these references improves cross-platform collaboration, allowing teams to communicate effectively and manage tasks more efficiently.
This method can be applied across **any supported integration**. If you encounter difficulties mapping custom fields in your preferred software, don't hesitate to contact us at our [Support Portal](https://getint.io/help-center).
### Creating Custom Fields
#### Step 1: Create Custom Fields
Ensure you create the required custom fields in both workspaces:
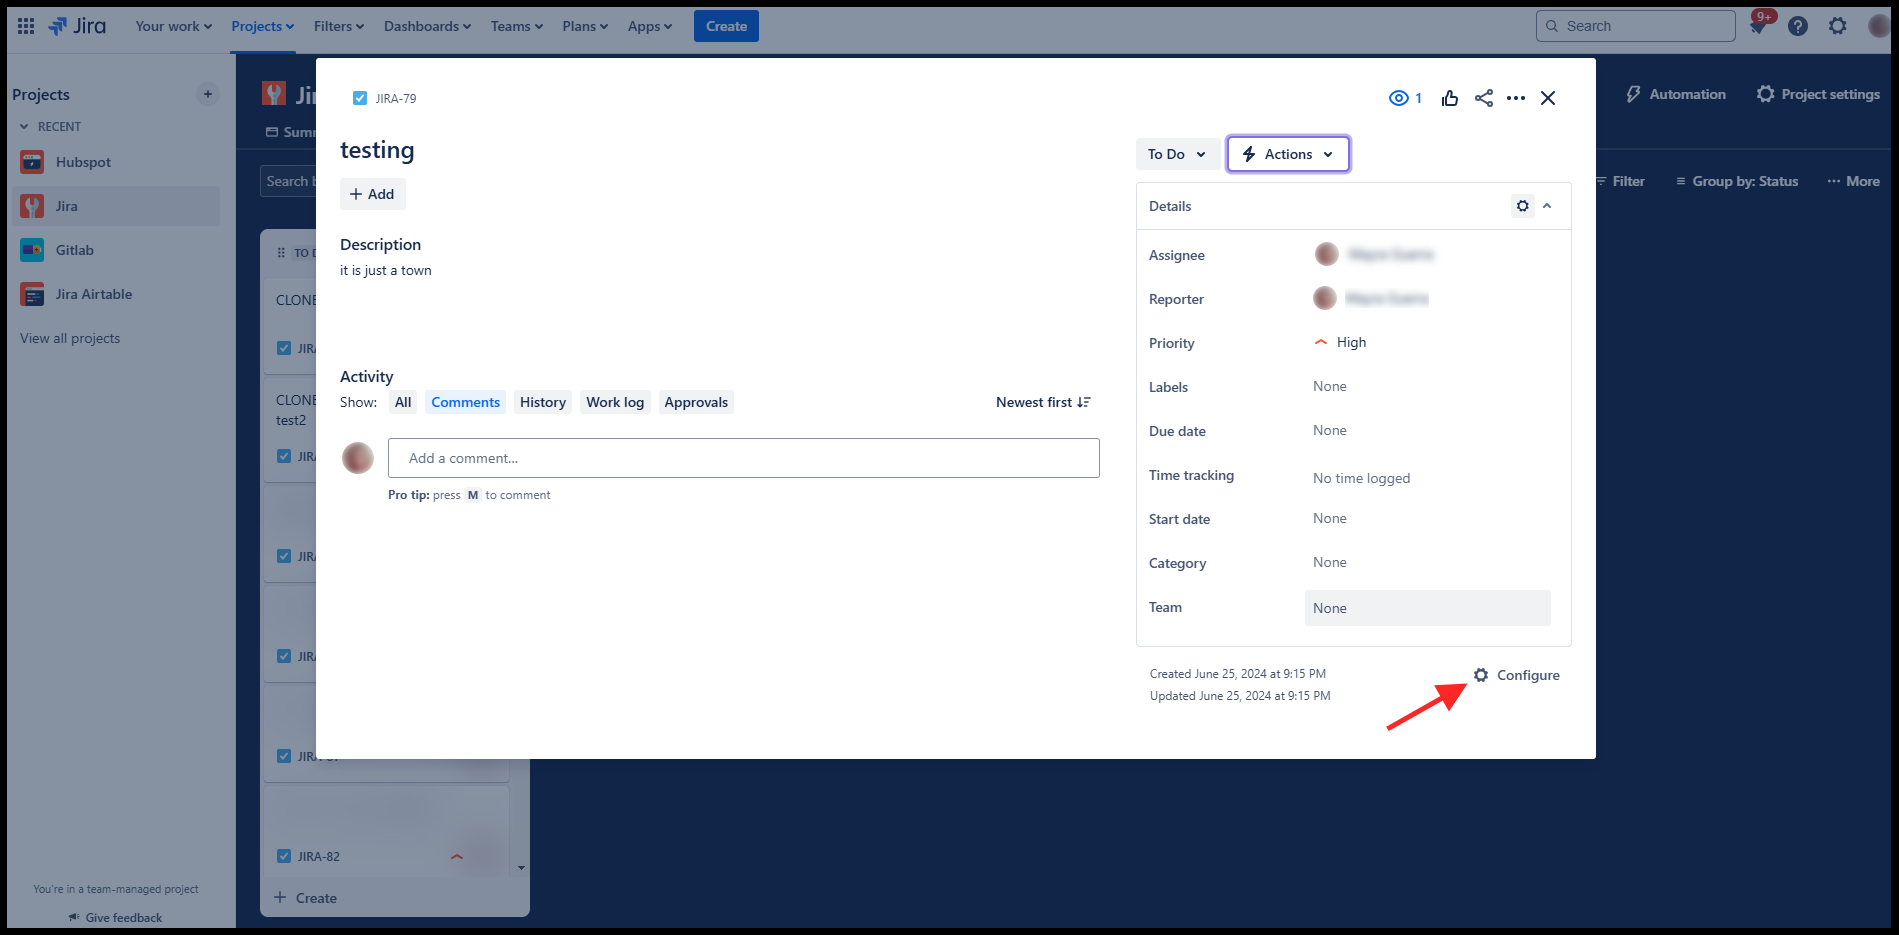
1. Open a task and scroll down the right-hand panel.
2. Click **Configure** to create a new custom field.
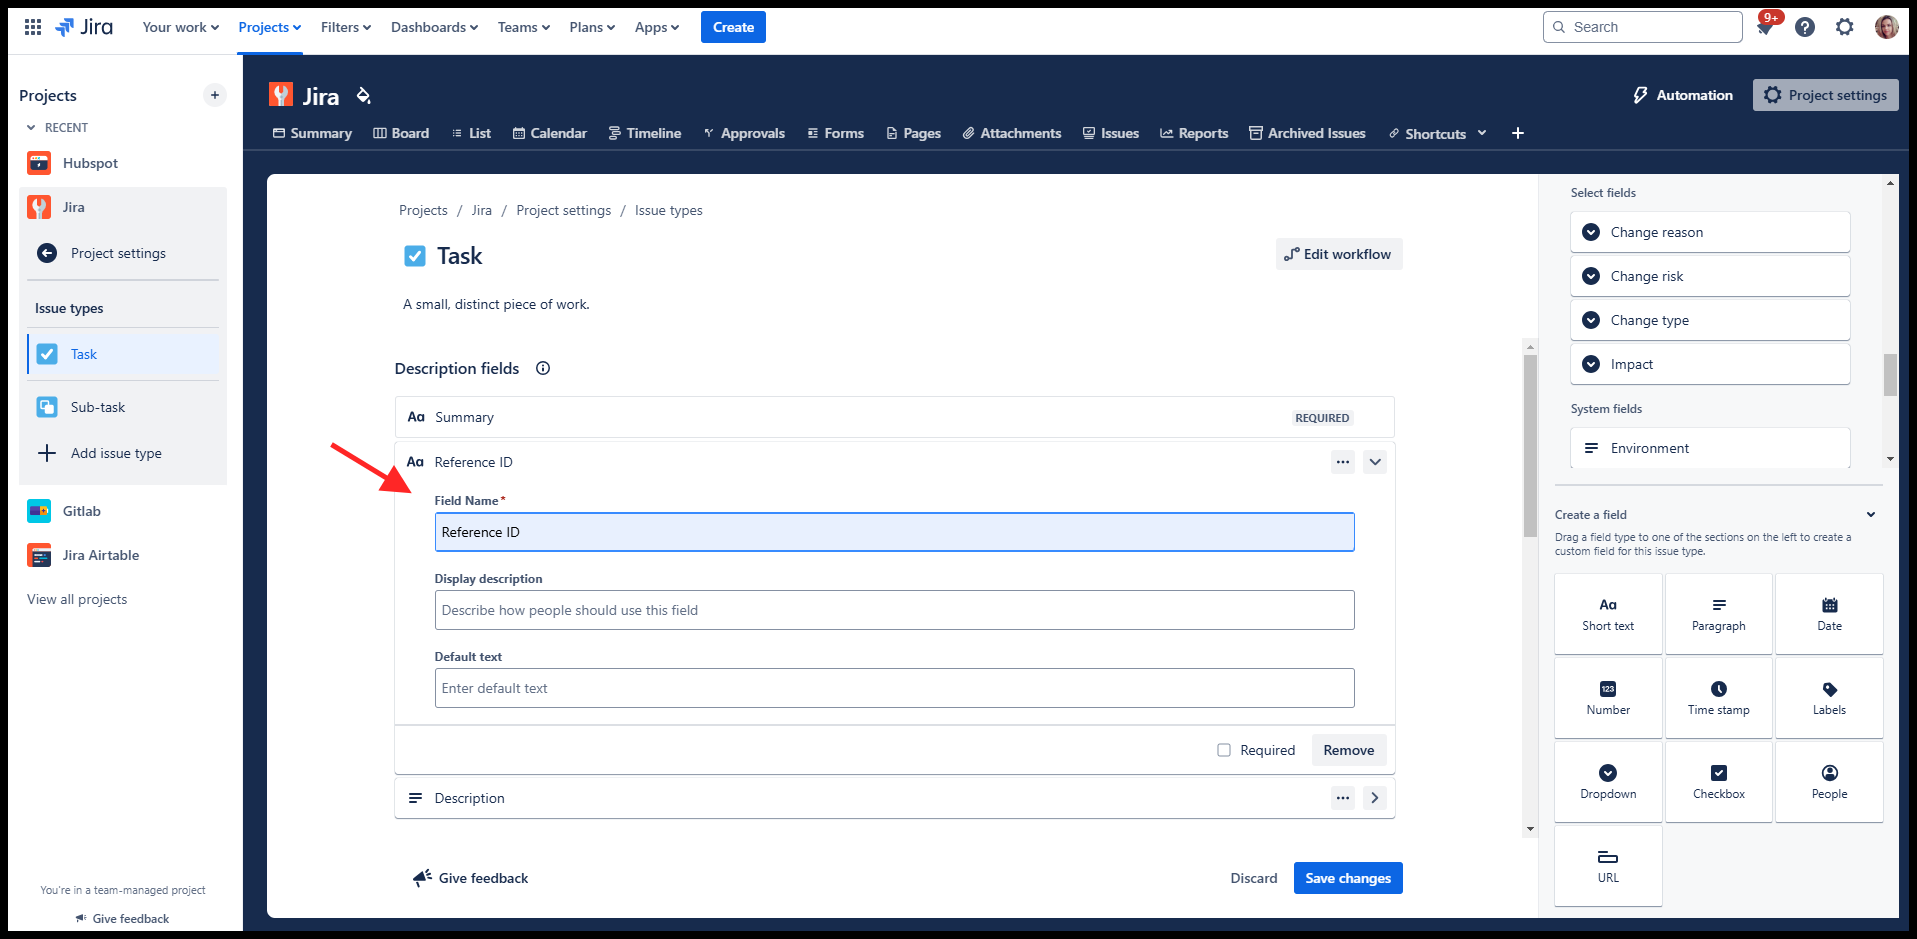
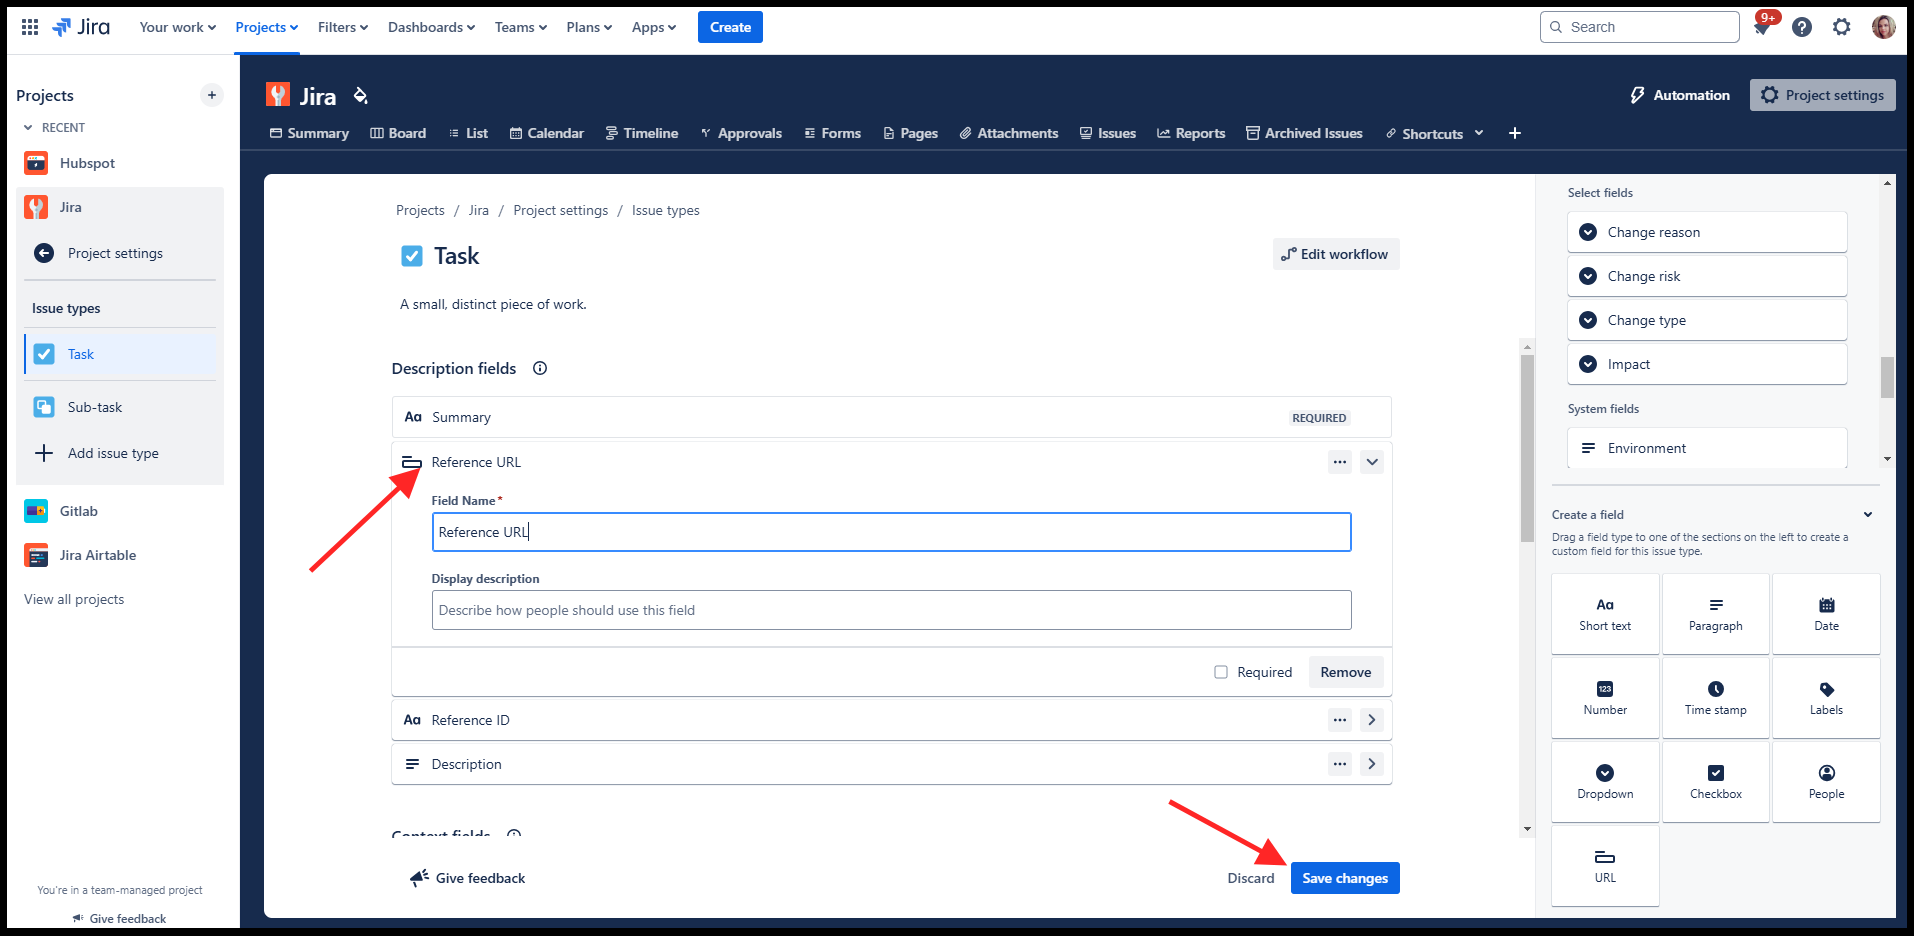
3. Add:
* **Text Field** for IDs.
* **URL Field** for links (or use a Text Field if URL fields aren’t supported).
4. Add the fields to your layout, name them appropriately, and save the changes.
{% hint style="info" %}
The process for creating custom fields varies between software platforms. Check our [documentation](https://docs.getint.io/guides/integration-synchronization/how-to-create-a-custom-field-in-all-supported-software) for guidance
{% endhint %}
#### Step 2: Map Custom Fields
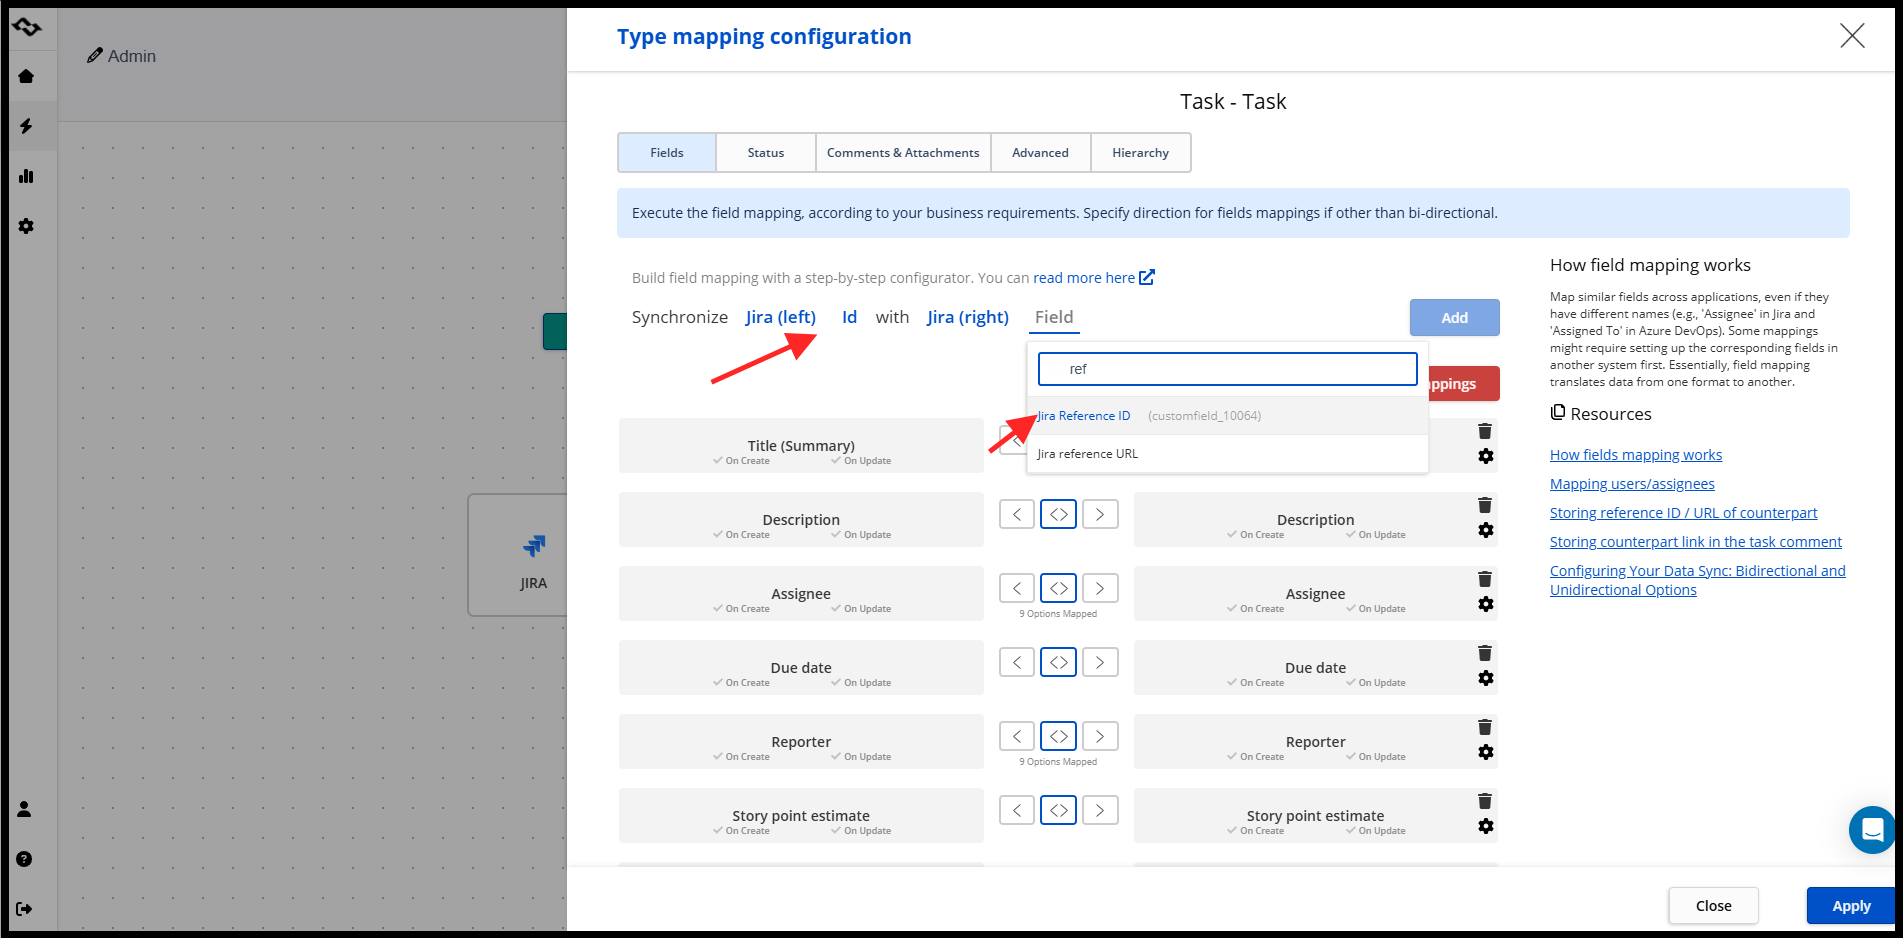
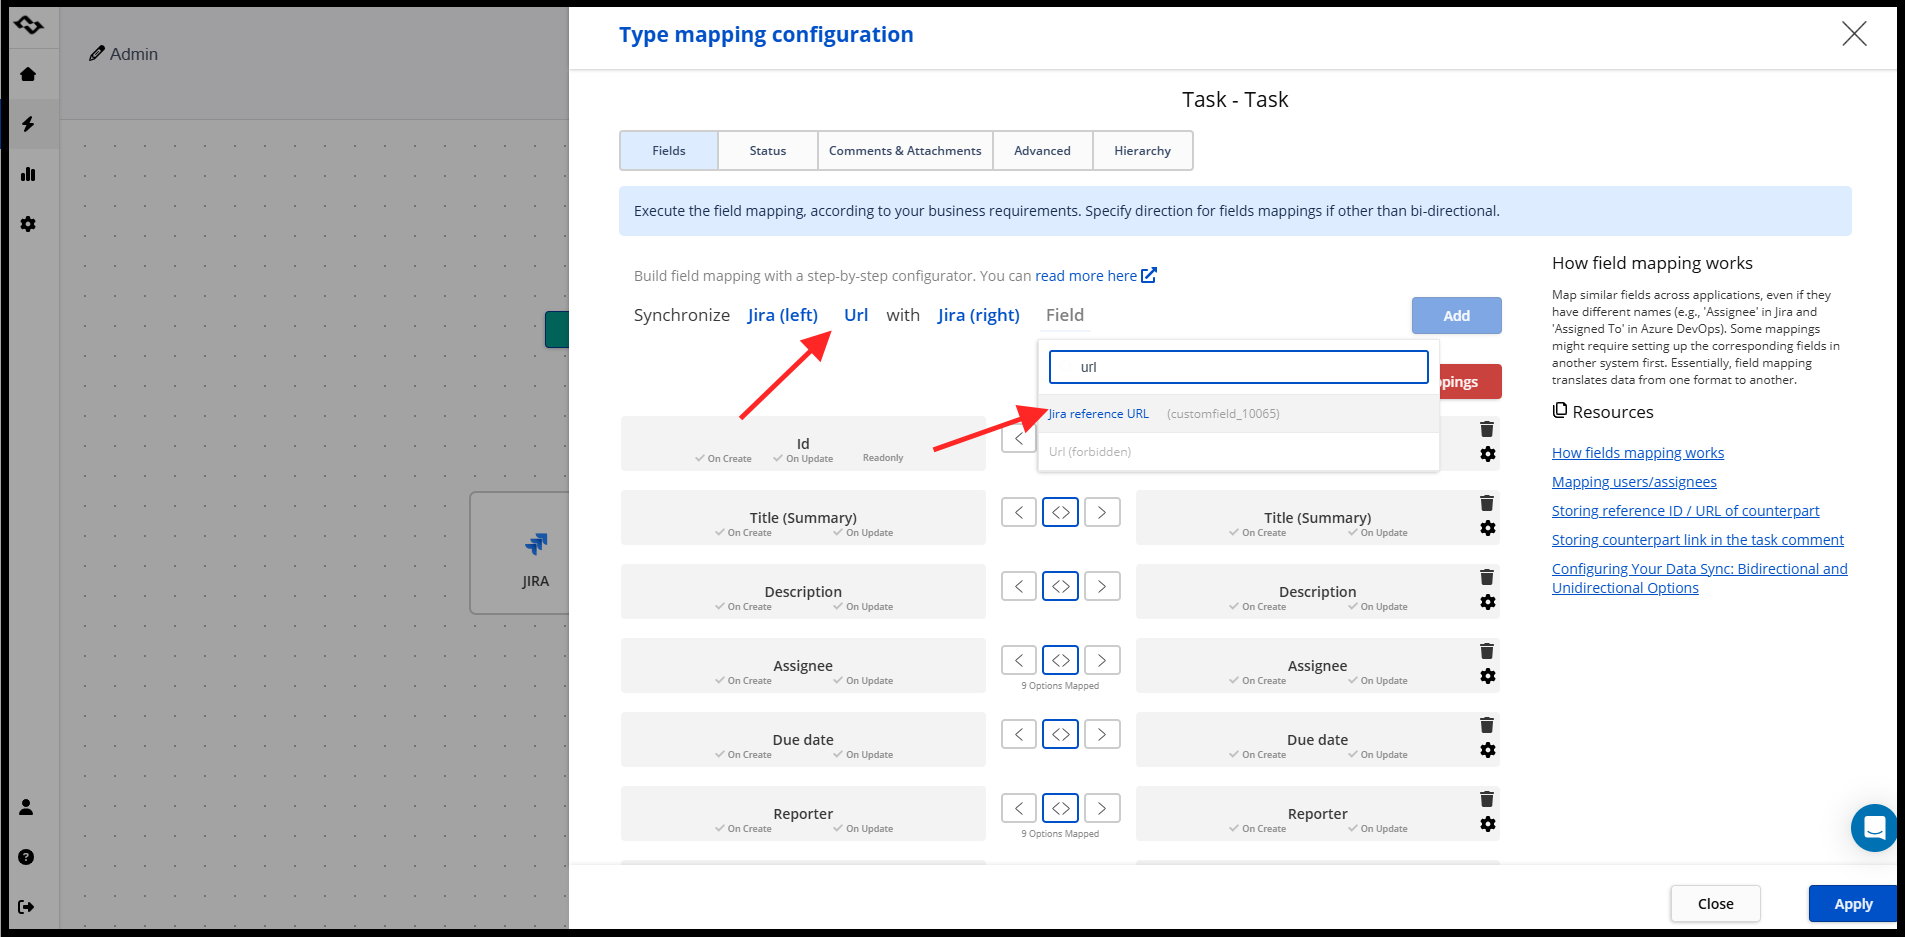
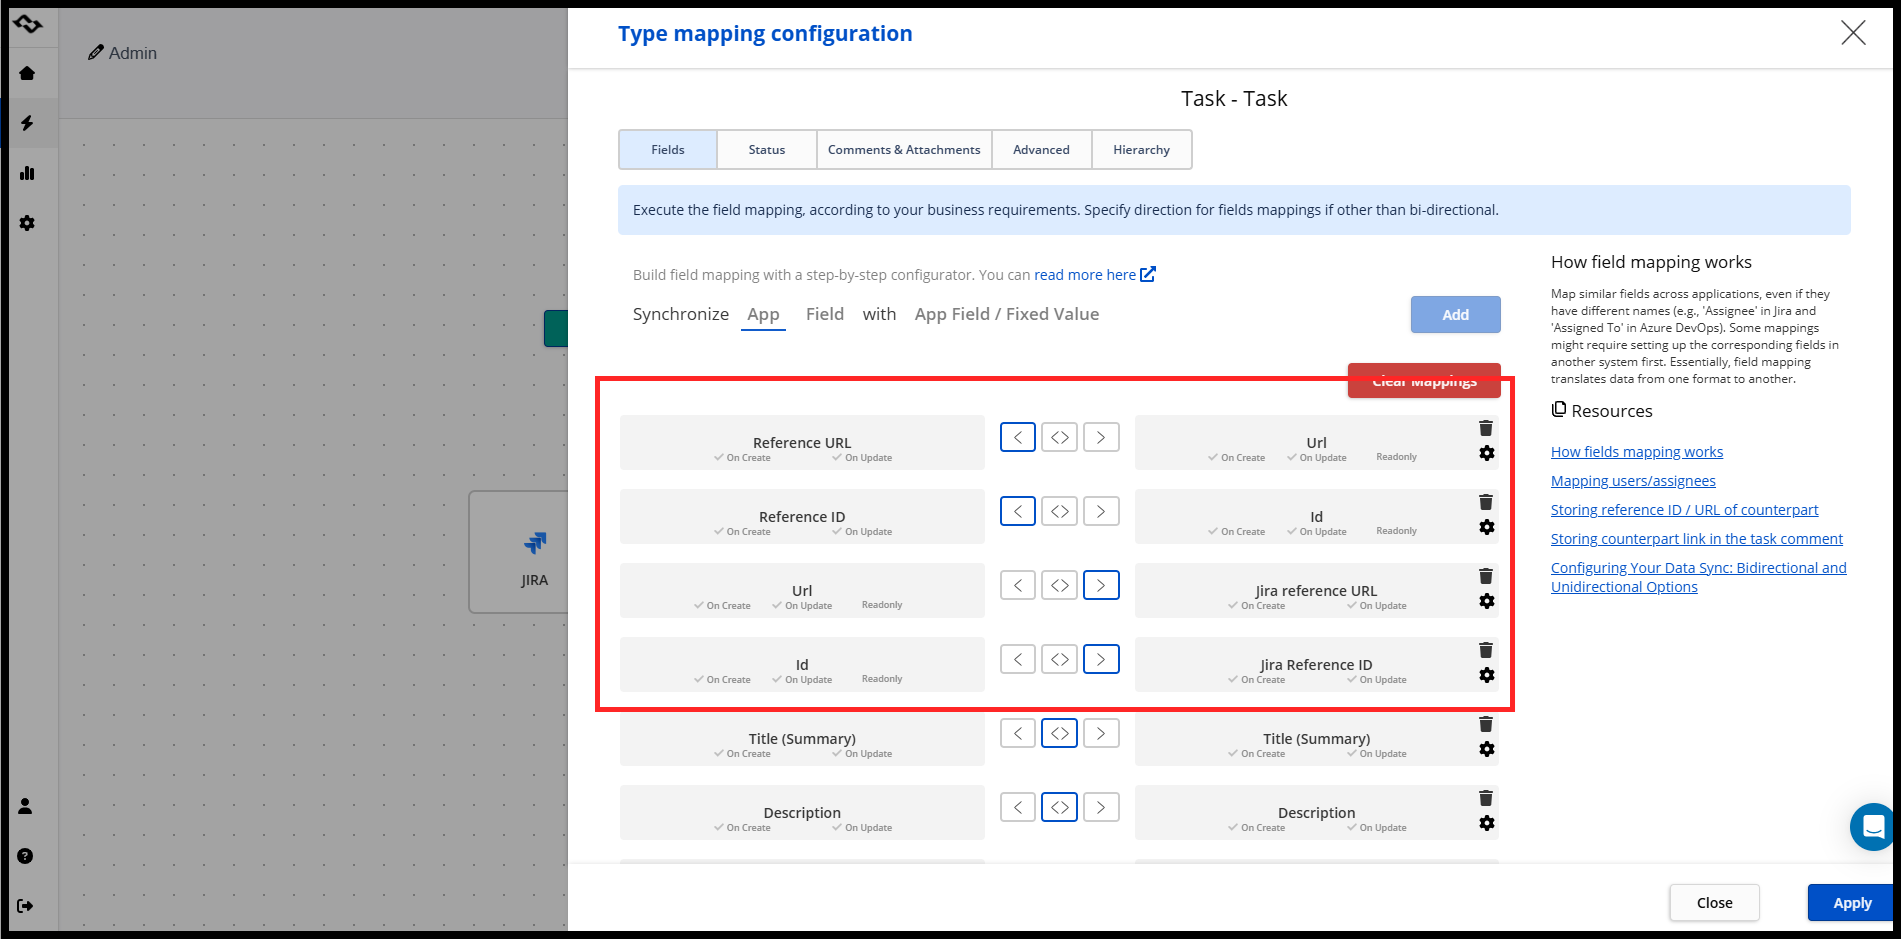
In Getint, map the custom fields between the two platforms. Here’s an example for Jira (left) and Jira (right):
1. Use the drop-down menus to map the following fields:
* **ID (On Jira Left) ↔︎ Jira Reference ID**
* **URL (On Jira Left) ↔︎ Jira Reference URL**
* **Reference ID (custom field) ↔︎ ID (On Jira Right)**
* **Reference URL (custom field) ↔︎ URL (On Jira Right)**
2. The fields are one-directional as the data from fields like ID and URL are read-only and cannot be modified:
{% hint style="warning" %}
**Important Warning for ServiceNow Users**\
When integrating **ServiceNow (SNOW)**, if you want the **Ticket Number** to be referenced, you should use **Number** instead of **ID.**
* **Number** → Brings the actual ticket reference (e.g., **INC0001234**).
* **ID** → Brings the system-generated unique identifier (a much larger numeric value).\
Selecting the wrong field may result in incorrect references being stored.
{% endhint %}
#### Step 3: Populate the ID/Issue Key During Creation
When a source item is created but the value doesn't populate to the corresponding field, you need to enable the update option in the field mapping configuration.
To store that value in your destination custom field on creation, open the field mapping configuration for the pair (for example, **Issue Key** mapped to a **Jira Ticket #** custom field) and enable this option:
**Update "field X" with value from "Issue Key" after the Jira item is CREATED.**
{% hint style="info" %}
This option appears on the **left or right side** of the field mapping configuration depending on the direction of your integration. Enable it on the side that receives the value from the source item.
{% endhint %}
#### **Step 4: Test the Integration**
After setting up the integration:
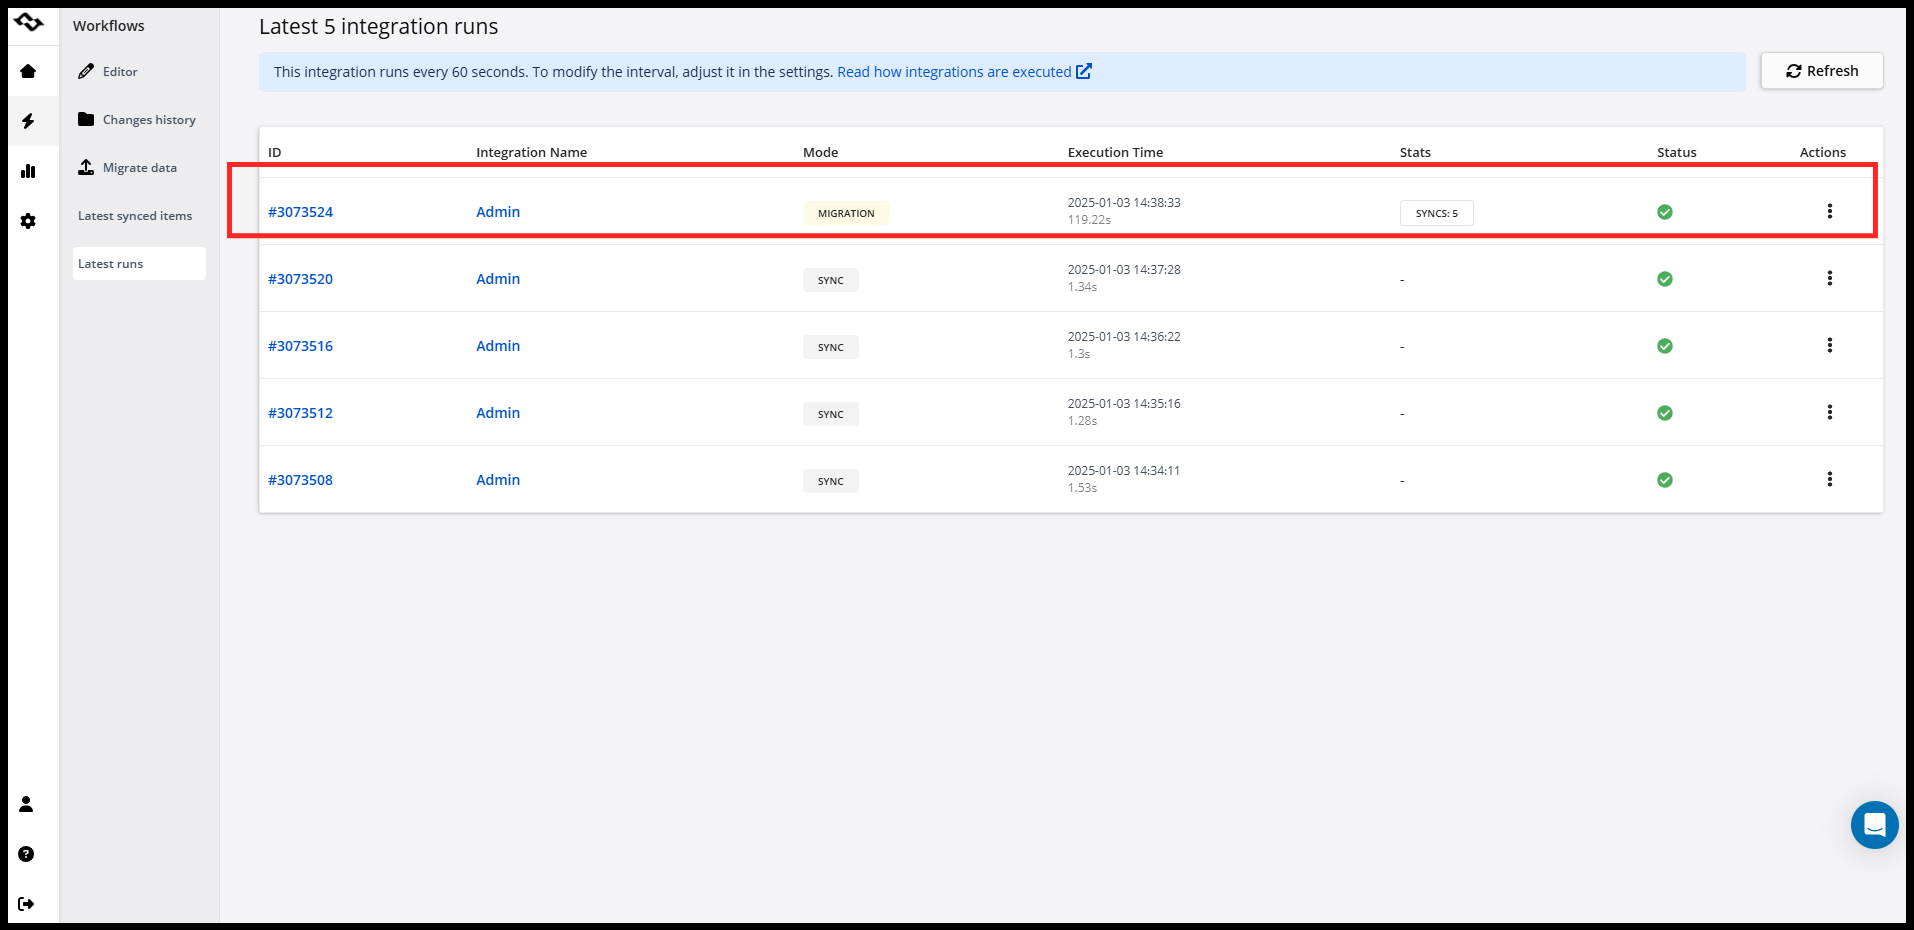
1. Run a migration or sync to transfer data between platforms.
2. Verify that mapped fields are populated with the correct data:
* Jira Right fields should contain the IDs and URLs of the corresponding Jira Left tasks.
* Jira Left fields should contain the IDs and URLs of the corresponding Jira Right tasks.
{% hint style="warning" %}
Already synchronized issues will not receive URLs and Reference IDs unless you run a migration. These fields are only populated when a new work item is created, so a sync alone will not backfill items that already exist.
{% endhint %}
### **Why Use Reference IDs/URLs?**
Storing reference IDs/URLs is especially helpful for:
* **Filtering and Database Management**: Simplifies handling large volumes of tasks/issues/tickets.
* **Effective Collaboration**: Teams across platforms can reference tasks accurately and resolve issues efficiently.
### **Important!**
This setup applies to most integrations supported by Getint. For tools needing custom field mapping that require further development, please reach out through the [Support Portal](https://getint.io/help-center). Our team is here to assist with your integration needs.
Let us know if further adjustments are needed!
---
# Agent Instructions
This documentation is published with GitBook. GitBook is the documentation platform designed so that both humans and AI agents can read, navigate, and reason over technical content effectively. Learn more at gitbook.com.
## Querying This Documentation
If you need additional information that is not directly available in this page, you can query the documentation by asking a question.
Perform an HTTP GET request on the following URL with the `ask` and `goal` query parameters:
```
GET https://docs.getint.io/getintio-platform/workflows/storing-reference-ids-urls-across-integrations.md?ask=&goal=
```
`ask` is the immediate question: it should be specific, self-contained, and written in natural language.
`goal` is what the user is ultimately trying to achieve, the reason they need the answer. Sharing it helps GitBook give you a better, more relevant answer. A goal is most helpful when it describes the outcome the user wants rather than restating the question. For example, with `ask=how do I create an API token`, a goal like `automate deployments from our CI pipeline` lets GitBook tailor the answer to that use case.
The response will contain a direct answer to the question and relevant excerpts and sources from the documentation.
Use this mechanism when the answer is not explicitly present in the current page, you need clarification or additional context, or you want to retrieve related documentation sections.