> For the complete documentation index, see [llms.txt](https://docs.getint.io/llms.txt). Markdown versions of documentation pages are available by appending `.md` to page URLs; this page is available as [Markdown](https://docs.getint.io/guides/integration-synchronization/non-jira-connectors/asana-salesforce-integration.md).
# Asana Salesforce integration
Connecting Asana with Salesforce allows technical and sales teams to synchronize project management data with customer relationship management records. This integration ensures that updates on one platform are reflected on the other, reducing manual data entry and preventing discrepancies between your departments.
### Asana Salesforce Licensing Model
The Asana-Salesforce licensing model with Getint is designed to accommodate different integration needs. Here’s an overview:
#### Standard Licensing
* For non-Jira connectors, we offer a simple license tied to a fixed fee depending on the apps you’re syncing.
* This license covers the integration between 1 instance A (Asana) and 1 instance B (Salesforce).
* No hidden costs. You can sync an unlimited number of projects and work items between these instances.
#### Network License
* For managed services companies or organizations looking to integrate three or more instances (whether the tools are the same or different), Getint offers a **Network License.** This custom license covers a specific number of connections (i.e., up to 10 instances) and imposes no restrictions on the tools involved. You can also swap the integrated tools while the license remains active, offering unparalleled flexibility.
For more details on licensing, visit our [**Licensing Page**](https://docs.getint.io/billing-and-services/licensing).
#### Salesforce API Requirements
Salesforce requires API access for integration. API access is enabled by default in the following editions:
* Enterprise Edition
* Unlimited Edition
* Performance Edition
* Developer Edition
API access is **NOT enabled** by default in:
* Group Edition
* Essentials Edition
* Professional Edition
{% hint style="info" %}
If using a Salesforce edition without API access enabled, please contact Salesforce support or refer to the Salesforce Help & Training Community.
{% endhint %}
#### Requirements to Build Your Integration:
* For non-Jira connectors, we offer 2 options: [**Getint Saas**](https://app.live.getint.io/) and the **On-premise version** (self-hosted environment). More information about Getint On-premise [here](https://docs.getint.io/getting-started-with-the-platform/deployment-options/on-premise-deployment).
* Comments are attributed to the user who created the connection. Therefore, we recommend using dedicated Service Accounts for both instances.
* **Personal Access Tokens** are required for Asana and Salesforce authentication. You can find the steps to generate the access token for your connectors here: [Connection Guide](https://docs.getint.io/guides/quickstart/connection#asana).
### Setting Up Your Asana Salesforce Integration
#### 1. Access the Getint App
* Log in at [app.live.getint.io](http://app.live.getint.io/). If you do not have an account, click **Sign up** to create one.
* Enter your details, select the apps you want to connect, and click **Create new workspace**.
* After you create the workspace, go to it to launch Getint.
* The Getint interface will load.
#### 2. Create an Integration
* Go to **Workflows** (lightning bolt icon), and click **Create Integration**. From this menu, select **Continuous Sync** or **Data Migration**.
#### 3. Generate an Asana Personal Access Token
* Log in to Asana and follow the video below to generate your Access Token.
{% embed url="" %}
#### 4. Generate Salesforce Credentials
* Generate OAuth credentials to connect with Salesforce. These allow Getint to access your instance.
{% embed url="" %}
{% hint style="info" %}
For detailed instructions on setting up your account credentials, please refer to our [Salesforce Tokens & Requirements](https://docs.getint.io/guides/quickstart/connection#salesforce) guide.
{% endhint %}
#### 5. Connect to Asana
* In Getint, click on **Connect App** and choose Asana.
* Enter your Access Token for Asana.
* Select the project you wish to integrate with Asana.
{% hint style="warning" %}
You can only select one project when syncing with Salesforce. Selecting multiple projects will cause Salesforce to disappear from your available integration options.
{% endhint %}
* Click **Connect** to establish the connection.
#### 6. Connect to Salesforce
* Now, click on **Connect App** and choose Salesforce. Enter your Salesforce instance URL in the **URL** field and click **Next**.
* Assign a name to the connection and enter the **client\_id** and **client\_secret** credentials.
* **Add** the connection and select it.
#### 7. Configure Type Mapping
* **Quick Build**: Automatically map fields and types between applications with this feature.
* **Manual Mapping**: Use this feature for full control over your integration. Click **+Add Type Mapping** to manually define your types, such as Case, Task, Account, and Contact.
* **Example mapping**: Task ↔ Case.
#### 8. Field Mapping
* Review or manually map fields within mapped types, including **title**, **description**, and **assignees**.
* Ensure synchronization flow is defined for each field, using the arrows and selecting **Apply**.
#### 9. Assignee Mapping
* Use the assignee mapping option to match Salesforce assignees to Asana assignees. For more details, visit our doc: [Assignees (users) mapping](https://docs.getint.io/getintio-platform/workflows/assignees-users-mapping).
#### 10. Status Mapping
* Map status fields to align between Salesforce and Asana. For example, **To do** in Asana could be mapped to **New** in Salesforce.
* You can also configure the status direction to support unidirectional transitions instead of bidirectional updates.
#### 11. How to Manage Comments & Attachments:
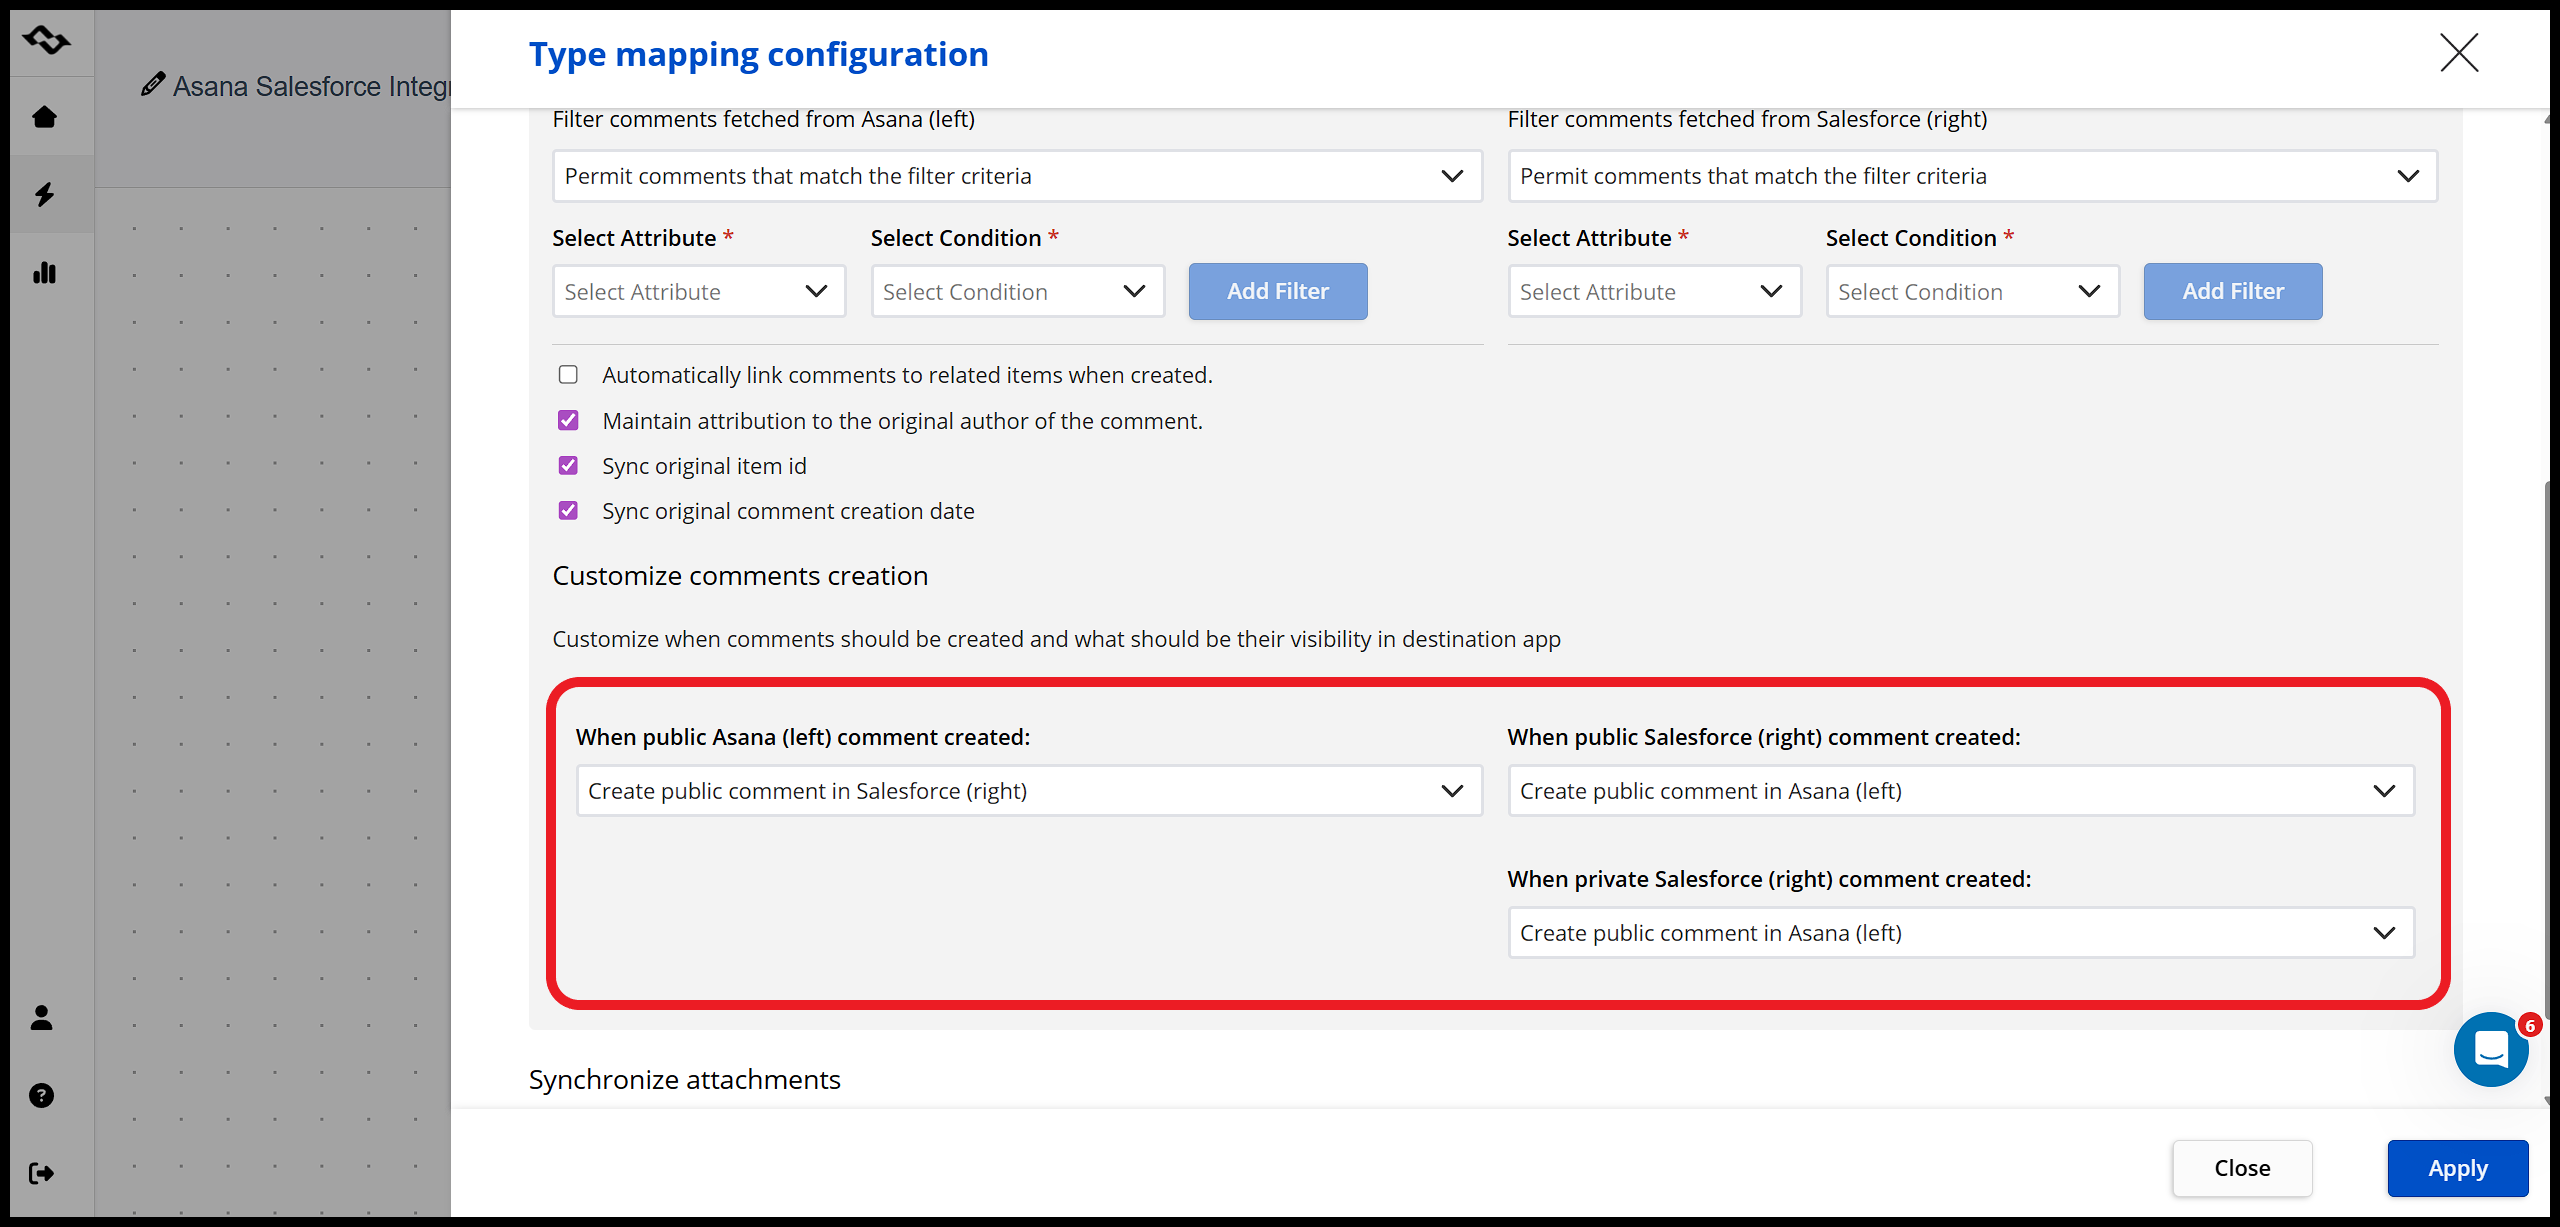
* The **Comments & Attachments** tab is enabled by default. You can configure these settings to match your organization’s needs, such as selecting unidirectional or bidirectional sync and filtering by criteria like creation date, author, or visibility (public/private).
* Use the **Customize comments creation** setting to manage how comments are processed. You can set comments to Public or Private, or choose to skip them entirely.
* You can configure the attachment sync direction by choosing between bidirectional, App A (left), or App B (right).
{% hint style="warning" %}
**Inline images** aren’t supported for the **Description** field.
{% endhint %}
#### 12. Advanced Tab
* Enable **Customize create/update actions** to manage item synchronization. This allows for specific rules, such as one-way creation for the left application combined with bidirectional updates.
#### 13. Filtering:
It is possible to filter the synchronization to have it customized for your needs and requirements. Please see the doc [Items Filtering](https://docs.getint.io/getintio-platform/workflows/items-filtering) for more details.
**UI Filtering Option:**
* Click on the filtering icon near the app icon in your integration. This will apply to that side of the integration.
* Select if the filtering applies to *All*, *New*, and *Synced* items.
* Note that if the option **New items** is selected, the filtering will apply only to the new items, and the already synced items will continue to sync and update. If the option **Synced items** is selected, only the already synced items will be updated based on that filter.
* Choose the options and add the value for the filter. It is possible to filter more than one option for each field.
* Select **Apply** after creating the filters and **Save** the integration.
#### 14. Test the Integration
* Create test issues or tasks in Jira or Asana and observe how they synchronize.
* Ensure that the data between the two platforms is correctly synced.
* Monitor the integration status and the logs in Getint to verify that everything functions as expected.
### Conclusion
Following this guide lets you set up the Jira-Asana integration with Getint. This configuration supports data synchronization of issues, tasks, and workflows across development and project management tools, allowing teams to collaborate while connecting developers and project managers.
For further assistance, please contact us at the [Support Center](https://getint.io/help-center) or [Schedule a Demo](https://calendly.com/d/cpws-jb2-8xx/demo-call-all-team).
---
# Agent Instructions
This documentation is published with GitBook. GitBook is the documentation platform designed so that both humans and AI agents can read, navigate, and reason over technical content effectively. Learn more at gitbook.com.
## Querying This Documentation
If you need additional information that is not directly available in this page, you can query the documentation by asking a question.
Perform an HTTP GET request on the following URL with the `ask` and `goal` query parameters:
```
GET https://docs.getint.io/guides/integration-synchronization/non-jira-connectors/asana-salesforce-integration.md?ask=&goal=
```
`ask` is the immediate question: it should be specific, self-contained, and written in natural language.
`goal` is what the user is ultimately trying to achieve, the reason they need the answer. Sharing it helps GitBook give you a better, more relevant answer. A goal is most helpful when it describes the outcome the user wants rather than restating the question. For example, with `ask=how do I create an API token`, a goal like `automate deployments from our CI pipeline` lets GitBook tailor the answer to that use case.
The response will contain a direct answer to the question and relevant excerpts and sources from the documentation.
Use this mechanism when the answer is not explicitly present in the current page, you need clarification or additional context, or you want to retrieve related documentation sections.


%20for%20Asana.png?alt=media&token=030be75e-76fb-46f3-90f2-85e8f7c7b0f8)